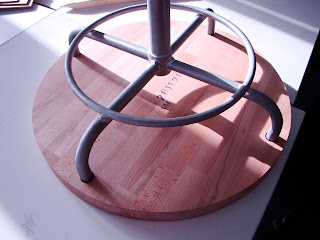
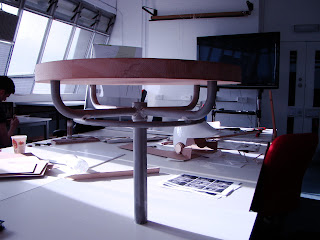
Now that the channels have been routed the concrete can be added.
The table top was covered in tape to stop the wood getting damaged whilst the concrete was put in. Once this happened the concrete was smoothed over using a trowel.
After this was done the tape was taken off to give the final touches to the concrete before it was left to dry.
There was quite a lot of residue from the tape left on the table top and this left the edges of the channels looking very messy. In order to fix this I decided to sand the entire table including the concrete.
The table was sanded with a rough 80 grit paper first to reveal the aggregate in the concrete. This also managed to achieve a flush finish across the table top. The table was then sanded through the grits finish at a very fine 320 to get the smooth finish back. Once the top was sanded a layer of shellac was applied as a sealant. This was then sanded back and a clear wood wax was added to protect the wood and give it a smooth silky finish.
Wax was applied and then any signs of directional application were removed by using elbow grease and 0000 steel wool (extremely fine). Concrete was given several coats of a water-based gloss sealant called gloss and seal. This means that even though the rough aggregate is shown it is smooth to touch and is a similar sheen to the finished wood.
MartinSmithDesign
Thursday, 18 April 2013
Sunday, 14 April 2013
Manufacturing the Table Top: Part 2
The channels need to be made into the table top.
In order to do this the router is going to be used to cut out channels 12mm deep into the table top. However, routers are not usually used to make circular channels. Since this is the case I made my own jig and attached the router to it so it would move around the table in a circular pattern.
The jig was made by taking a board longer than the diameter of the larger channel I needed to make and marking out where the cutting bit would pass through and drilling a large hole right through the board. Two bolts were then taken and the heads cut off and sharpened to a point. This was to mark where the machine holes were going to be so holes could be drilled through from the underside of the board. A small hole was then drilled into the centre of the table and a nail placed through the board at the right diameter for each channel. The router attached to the board was then able to me moved around in an accurate circular path.
Each pass around the circle took away 3mm of wood and therefore had to be done 4 times for each channel. The thicker middle channel took 3 different diameters to do. The top was then sanded down and two coats of shellac were applied to it.
A heavy exterior wood varnish is now going to be added around the areas where the channels are to ensure that when the concrete is poured the moisture does not get absorbed into the wood. This will be sanded off after the concrete has been poured.
In order to do this the router is going to be used to cut out channels 12mm deep into the table top. However, routers are not usually used to make circular channels. Since this is the case I made my own jig and attached the router to it so it would move around the table in a circular pattern.
Each pass around the circle took away 3mm of wood and therefore had to be done 4 times for each channel. The thicker middle channel took 3 different diameters to do. The top was then sanded down and two coats of shellac were applied to it.
A heavy exterior wood varnish is now going to be added around the areas where the channels are to ensure that when the concrete is poured the moisture does not get absorbed into the wood. This will be sanded off after the concrete has been poured.
Saturday, 13 April 2013
Side Project: Chopping Board
As a side project that will probably take more shape after the Viva presentations I am going to make a chopping board that can be taken apart into smaller pieces. This will be done by embedding magnets into the wood. I am not sure of finished yet but there will hopefully be a finished product and all the updates soon!
Friday, 12 April 2013
Manufacturing the Table Base
As well as having a circular top the table needs a base to be made. In order to do this circles that are the wanted width of the base are going to be cut out of the salvaged work surface and then glued together. Once they have been glued together they will be turned on the lathe to give the desired shape.
The salvaged work surface was marked out in order to get the relevant pieces needed for the base.
All of these different pieces were then cut out and the edges were sanded into circles.
The three circles were then glued and clamped together in order to make them solid enough to turn on the lathe.
The pieces of wood were attached to the lathe by screwing in a chuck to the base. This was then screwed into the late and locked into place, so it could not come loose.
Turning tools were then used to get the required shape needed for the base of the table.
Once the shape was attained the wood was sanded, starting at a rough 80 grit to a very fine 320 grit.
Once the base was sanded a hole was drilled into the top so the frame could slow in. This was done bigger than the frame with the intention of using sharpened protrusions from the frame to grip into the wood.
As well as the hole being drilled a first coating of shellac was put onto the base. Shellac is derived from a resin that is secreted from an insect native to south-east Asia. It is non-toxic and gives a nice natural finish as well as sealing the wood. This will be applied and sanded using very fine sandpaper until the desired finish is obtained.
Manufacturing the Table Top: Part 1
Even though the stool is now being transformed into a table rather than into a new stool the different design features are more or less staying the same, since this is the case the manufacture should be quite similar to what was originally planned. The wood that is being used to create the top and in fact the base of the table as well is a piece of wooden work surface due to be skipped after a kitchen refurbishment.
The next stage was to drill holes in the bottom of table in order for the base and the table to be attached to each other.
The salvaged work surface wood was cut into two different parts as it was slightly warped and working in two smaller pieces was easier and more likely to cause less damage.
The different sized circles were then marked onto the wood with the piece on the right being the one that is going to be the table top
The corners were cut off the square and as much of the material was removed before the sanding process was started. This was done on an orbital sander and the final shape was achieved.
The next stage was to drill holes in the bottom of table in order for the base and the table to be attached to each other.
The table top now fits onto the body perfectly. The remaining tasks include routing out the channels on the top side of this piece in order to pour in the concrete that Morna wants along with any sanding and finishing that she wants done.
Wednesday, 10 April 2013
Testing the Service: Body Photo Process Booklet
As designed the booklets that are going to be sent out during the manufacturing process have been started and are then getting sent out. The first one is the frame or body of the item which is now being designed as a table. The booklet is shown below:
Testing the User Interaction: Getting the Final Idea Booklet Back
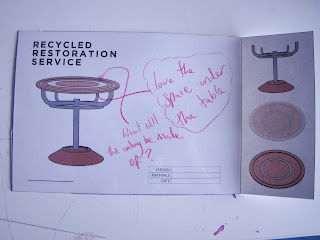
After sending off the final idea booklet to Morna, I have been sent it back. Morna has come up with a couple changes to what we discussed originally, mainly the fact that instead of using the refurbished stool as a stool to use it as a table instead. She has also added in a couple of other ideas. These are shown below in the following images:
I also spoke to Morna when she gave me the booklet back about the different sizes and she decided that she liked the idea of it being a table rather than a stool. With this is mind I have carried on with everything.
I also spoke to Morna when she gave me the booklet back about the different sizes and she decided that she liked the idea of it being a table rather than a stool. With this is mind I have carried on with everything.
Subscribe to:
Comments (Atom)


